Sunday, April 11, 2021
6 Food Photography Myths - Busted

Story by Jules Sherred. Food photography is one of the most technical forms of photography that fall within a wide range of classifications, including fine art, editorial, lifestyle, advertising and more. In the infancy of food photography – think Mad Men – the form was mainly advertising and had a very specific look, thanks to tomfoolery and plastic food. In recent years, there has been a huge shift in the industry, thanks to a mix of cameras in every pocket and truth in advertising laws.
Truth in advertising laws prohibit false or misleading representation of something being sold. This covers food images used for editorial and lifestyle pieces–magazines, cookbooks, newspapers, blogs, etc., –and advertising and packaging. Breaking these laws have both criminal and civil repercussions. As a result, everything is done in camera. Images are handed over with only slight adjustments made in Lightroom. On rare occasion we need to open Photoshop to spot heal a crumb that needs to be removed because the healing tools in Lightroom aren’t quite good enough.

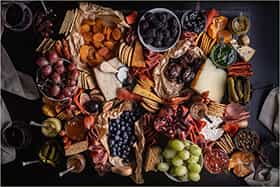
THIS CHARCUTERIE BOARD IMAGE OF MINE IS AN EXAMPLE OF THE MOST AMOUNT OF TWEAKING THAT I CAN DO WITHOUT RUNNING AFOUL OF LAWS. THE IMAGE SHOWS HOW IT LOOKED STRAIGHT OUT OF CAMERA, HOW IT LOOKED AFTER SOME SLIGHT ADJUSTMENTS IN LIGHTROOM, AND THEN AFTER SOME CRUMBS CLEAN UP IN PHOTOSHOP USING SPOT HEALING.
And then it is up to the client’s art department to decide if any more edits need to be done. And those are also very small adjustments, which can include composites as long as it doesn’t materially alter anything.
While the look, feel, and techniques used to capture food images have changed dramatically, many myths persist. These myths not only harm the industry, the artists behind the camera, and dissuade people from pursuing this highly technical and artistic field of photography, they also make for ill-prepared photographers who may be thinking about pursuing a career in one of the many fields of food photography.
It is time to bust some of these myths that remain from those Mad Men days.
1. Motor Oil Is Not Used in Food Photography
And neither is WD-40 or any other synthetic product. Back in the day, motor oil was used for things like maple syrup, browning a turkey or chicken, and more. WD-40 was used to help create specular highlights, as specular highlights tell the brain something is yummy and creates a salivating reflex.
Now, specular highlights are created by understanding directional lighting and using a single light source. Sometimes, there may be some help with a brush of olive oil or food grade glycerin. But even that is rare. Food stylists and specialized cooks know how to prepare and plate food based on the lighting setup to make those highlights happen naturally.
Turkeys and chickens are browned to perfection in the oven while also leaving them slightly undercooked, so they stay plump during the shoot. Then they are placed back into the oven to finish cooking for the end-of-shoot feast. Steak and roasts are cut right before the shot to keep that red, juicy look, after they have been wrapped in aluminium foil to lock in those juices and the colours.

DOUKHOBOR BORSHCH IMAGE STRAIGHT OUT OF CAMERA, AFTER SLIGHT EDITS IN LIGHTROOM, AND THEN SOME FIBER CLEAN UP ON THE PLATE USING SPOT HEALING IN PHOTOSHOP
To keep maple syrup from being absorbed in pancakes and waffles, pancakes and waffles are often frozen when shot. This is how to prevent syrup from absorbing and creating an ugly brown mess of food.
2. We Do Not Paint Fruit and Vegetables or Use Lipstick on Strawberries
There is a whole team behind a food photography shoot. Even before the cook and stylist get involved, there is a shopper who spends hours going to farmers’ markets and grocery stores picking the best-looking ingredients for a shoot. Doing so takes hours. Sometimes all of these roles fall to the photographer but they are separate jobs all billable at different rates and all requiring special knowledge and skills.
After the food is shopped, it is stored in special ways to keep it as fresh as possible for as long as possible. Every herb, piece of fruit and vegetable has unique conditions that need to be met to keep them looking their best. We use things like lemon juice to keep things from browning, which is also common in restaurants and home kitchens. On the day of the shoot, some things are kept in ice water and only added to plate right before the snap. There are also multiples of each dish prepared and the food only reaches the set after stand-ins are shot to make sure lighting, exposure and focal distance are locked in.
3. We Do Not Nail, Screw, or Glue Things Down
Yes, sometimes we will use toothpicks to hold a sandwich together, or museum putty or a makeup sponge to prop something up or put a small bowl upside-down in a larger bowl and add food on top of that to give it added height without having to use a tonne of food. But none of the things alter the look, feel, or behaviour of the food.
Museum putty under a plate can be used to help offset lens distortion that can’t be fully corrected in Lightroom. Putty and sponges are sometimes used to prop up an item that just won’t stay where it needs to in order to catch the light to create those specular highlights. And who hasn’t used toothpicks to keep tall sandwiches or burgers together. Even restaurants to this.

GARAM MASALA STARIGHT OUT CAMERA, AFTER SLIGHT EDITS IN LIGHTROOM, AND THEN SOME SPOT HEALING ON THE BOWL IN PHOTOSHOP
4. We Do Not Use Glue for Cheese Pulls
If you are cooking something and can’t get that cheese to pull, it is probably because you are using cheese that comes shredded or sliced. Those cheeses are treated with a powder to keep them fresh. That powder inhibits the cheese from melting properly.
If you want that cheese to pull, grate or slice that cheese by hand. You can give it a bit of extra elasticity by placing that pizza, sandwich, or cheese-covered crackers in the microwave for a few tics. And you can use a heat gun to reseal everything and try again if you don’t get it on the first pull.
No glue. Just an understanding of cheese and how it behaves when treated with different types of heat sources.
5. We Don’t Use Fake Ice Cream (or Fake Food) but Fake Ice Is OK
Shooting ice cream is tough. You need it to be at various stages of melting. And it must be real for a shot that will be used to sell food in editorial and lifestyle, advertising, or packaging. The real “trick” is to scoop the ice cream, place it on a cookie sheet that has been lined with wax paper, and put that sheet in the freezer until it is time to shoot. Lots of cookie sheets with lots of scoops of ice cream that are placed on the set right before the snap is taken. Some scoops come out a bit earlier to allow them to melt a bit. But they are always coming out on a rotation and then someone gets to eat them once they are no longer viable for the camera but are still viable for eating.

CHICKEN KORMA STRAIGHT OUT OF CAMERA, AFTER SLIGHT EDITS IN LIGHTROOM AND HAIR REMOVAL USING SPOT HEALING IN PHOTOSHOP
But we do absolutely use fake ice and that is okay because we aren’t selling the ice. We are selling the drink, or the lifestyle associated with the drink. And not everyone uses fake ice. That all depends on one’s ability to either buy ice or make ice that doesn’t have the cloud caused by minerals found in water.
If we were selling ice though, it would have to be the actual ice and we use the same techniques as we use for ice cream to keep it perfect for the camera.
6. All Food Is Edible When the Shoot Is Over
It certainly was not always this way. But now, rarely does anything on set go to waste. Things get prepared for the camera, go to the camera, and once the shot is done, goes into someone’s belly or the fridge. Often, there is leftover food that goes home with the crew or to charities that feed unhoused people.
In average day, six to eight dishes can be shot if there is a full crew. A full crew consists of a tech person, at least one assistant, a food stylist, a prop stylist, a cook, a shopper, and of course the photographer who is a wizard with directional lighting and has special knowledge of food behaviour. Each dish has multiple plates ready to be swamped out when needed to keep everything fresh and looking good. That creates a lot of delicious ready-to-eat food should never go to waste, for a whole lot of reasons.
The client also sees the images as they are being shot and approves the finals that will go on to be processed as they are being shot. During COVID times, this is done remotely using software like Microsoft Teams when the shot can’t be done safely on-location or outdoors.

RAINBOW HARVEST STRAIGHT OUT FO CAMERA, AFTER SLIGHT EDITS IN LIGHTROOM AND THEN SPOT HEALING IN PHOTOSHOP TO REMOVE A COUPLE BRUISES I CREATED WHEN I DROPPED THE GREEN PEPPERS WHILE BUILDING THE SCENE
There are many more myths but these six myths are the ones that I hear most often.
If you are thinking about getting into food photography, watch my food photography PPOC Live webinar where I go over the very fundamental of lighting and give some more tricks to help you get started. And while you don’t have to be a foodie, it certainly helps so that you can cook at home and learn for yourself what is required during all phases of a shoot to get those photos that literally make the observer salivate.
Submission by Jules Sherred.
Based in Duncan, BC but serving all of North America via the power of the internet plus on-location on Vancouver Island, Jules Sherred—owner of Polaris Creative—works as a food photographer and stylist, writer, journalist, and outspoken advocate for disability and trans rights. He is also an instructor for professional photographers looking to expand their skills, teaches through his local Arts Council, is working on an art exhibit set for 2022, staff writer for Fstoppers and is an accredited food photographer with the Professional Photographers of Canada.


