Wednesday, May 8, 2024
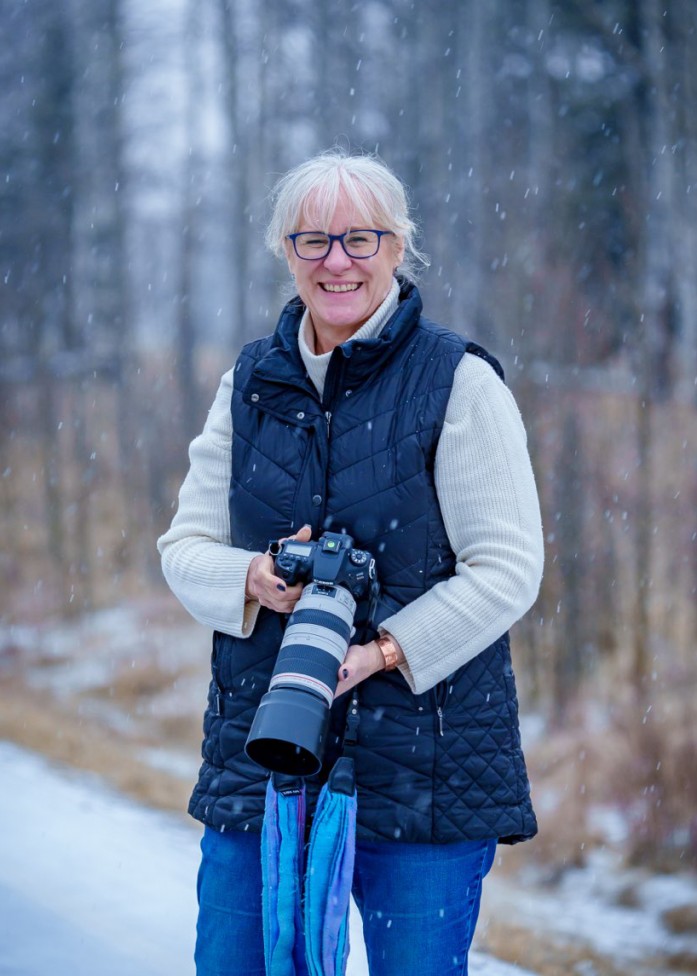
Featured Member - Terril Bodner -How to Capture the Northern Lights.
Terrill Bodner is a self-taught photographer with a sincere passion for all things photographic - beautiful light, big and little people and animals, and beautiful spaces, both indoors and outside. She has been an Accredited member of Professional Photographers of Canada since 2011 and has won several awards and has work in the Loan Collection. She earned her CPA (2015), MPA (2016), and SPA (2022) while growing her business and meeting other photographers who have become friends over the years. She enjoys the challenge of pushing herself to try new things, and has thirteen accreditations including Night Photography and has volunteered in several positions on the BC Board since joining PPOC.
Recently Terrill had her first solo exhibit! Her Aurora work was featured at Studio 2880 in Prince George, BC. Following are a few of her top tips on “How to Capture the Northern Lights”.
The Aurora Borealis is unpredictable. 2024 is predicted to be a peak year in an 11-year cycle of solar flares, so here’s hoping the rest of the year is full of more clear skies. The apps I follow rely on scientific data from NOAA (National Oceanic and Atmospheric Administration) and give a +/- 24 hours window of when the Aurora may be most active. I’ll take it. Saves me doing the math!
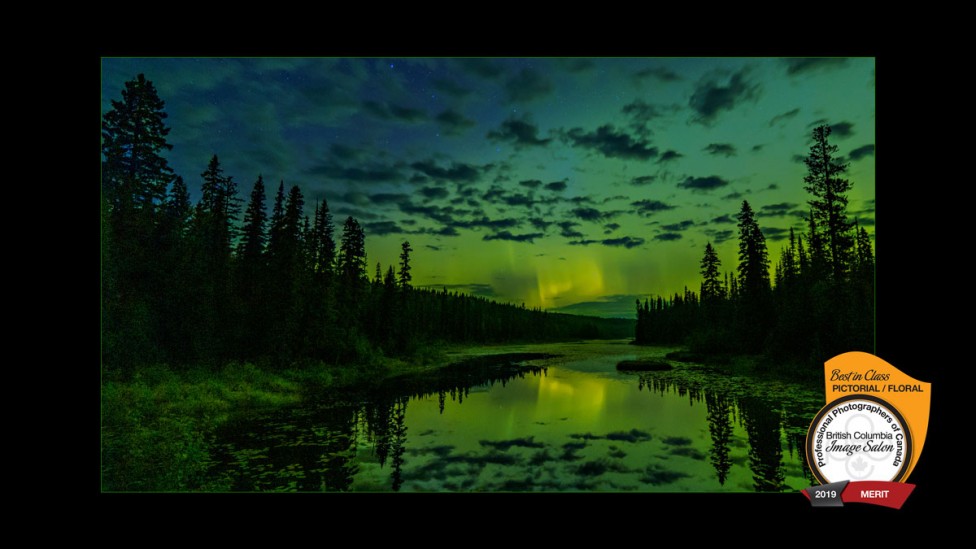
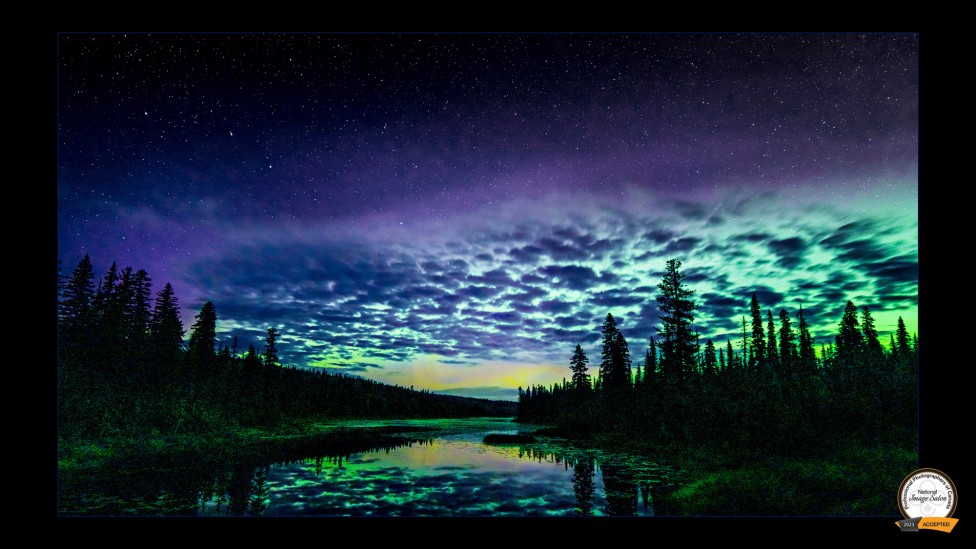
I’ve been photographing the Northern Lights (Aurora Borealis), or Lady Aurora as I like to call her, since 2015. On every occasion that I have seen her, she has a different outfit on. Sometimes she’s flirty, with frills of red along the edges. Sometimes magenta. Sometimes she throws her energy into the whole performance and is a rainbow of colour. Sometimes she dances quietly for those who came to watch.
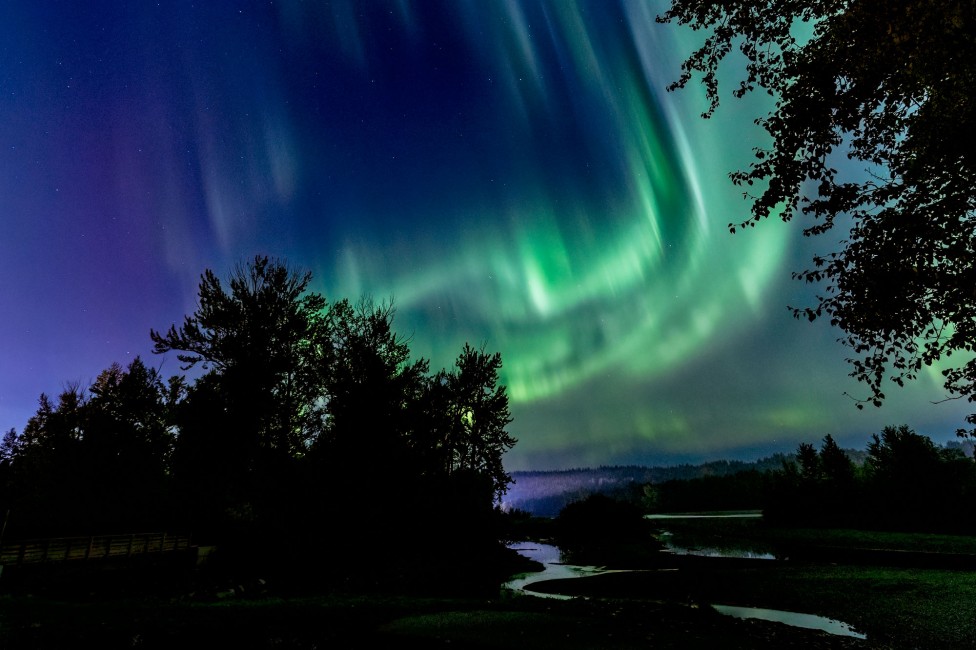
So what is an Aurora? An aurora is a natural light display seen in high-latitude areas in the Arctic and Antarctic. These brilliant lights can appear as spirals, curtains, rays, or flickering light across the entire sky.
This happens when there are disturbances in the magnetosphere caused by solar winds. The greater the speed of the solar wind the more visible the lights become. Most of the planets in our solar system have auroras. Earth has two bands, one in the north and one in the south polar regions.
When a solar storm approaches earth, some of its energy and small particles travel down the magnetic field lines at the north and south poles into Earth's atmosphere. There, the particles interact with gases in our atmosphere resulting in beautiful displays of light in the sky. When the particles interact with Oxygen it gives off green and red light. When particles interact with Nitrogen it glows blue and purple. From: Nasa Science Space Place website https://spaceplace.nasa.gov/aurora/en/
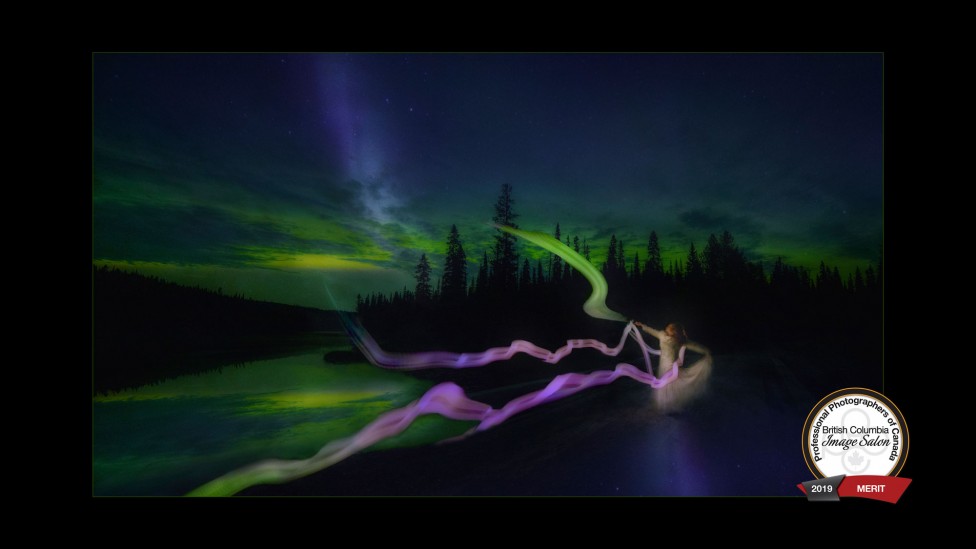
What is S.T.E.V.E? S.T.E.V.E (Strong Thermal Emission Velocity Enhancement) is an atmospheric optical phenomenon. It appears as a purple and green light of ribbon in the sky, named by a group of citizen scientists of Facebook’s Alberta Aurora Chasers in 2016. According to analysis of satellite data from the European Space Agency’s Swarm mission, the phenomenon is caused by a 25 km (16 mi) wide ribbon of hot plasma at an altitude of 450 km (280 mi), with a temperature of 3,000 °C (3,270 K; 5,430 °F) and flowing at a speed of 6 km/s (3.7 mi/s) (compared to 10 m/s (33 ft/s) outside the ribbon). The phenomenon is not rare but had not been investigated and described scientifically prior to that time. Previously it was known as a proton arc.
Recommended equipment: The best camera for Northern Lights is one with manual mode to control aperture, shutter speed, and ISO. A full-frame with a built-in interval timer or plugged in intervalometer will have less noise than a crop sensor camera. You can still use a crop sensor camera, but the image quality will be much lower. Bring at least 3-5 camera batteries for your shoot and keep them close to your body to keep them warm. Extra SD or CF cards too.
The best lens is a wide-angle lens that allows you to capture sweeping landscapes with the northern lights dancing overhead. A minimum f/2.8 to f/4 aperture and full frame focal lengths between 10mm & 24mm. For crop sensor cameras, focal lengths between 8mm & 20mm are ideal. Shooting at f/2.8 or wider allows light to hit the image sensor over a shorter exposure time than f/4 or higher. Prime lenses are usually better for sharpness.
A carbon fiber tripod with sturdy legs and adjustable ball head reduces wind vibrations in the legs. Check for tight locks and tripod head that doesn’t move at all during long exposures.
An intervalometer is not necessary but is nice to have. It helps reduce camera shake. Exposures are less than 30 seconds, but if you can set up multiple shots your fingers won’t get exposed to the elements as much. Set a 10-second timer with multiple shot feature so there is no camera shake when pushing the shutter button. Alternately you can use a shutter release.
If your camera has a built-in interval timer, set it up before your shoot. When camera is shut off, it disables the interval timer so you need to know where to locate it to turn back on. It’s very handy if setting up two or more cameras as you can keep shooting while working with the other camera.
Other gear to consider taking is a headlamp with red light to help when adjusting in the dark or walking into the bush. Using a brighter white light takes your eyes about 20 minutes longer to adjust to the darkness. A high visibility safety vest, gloves - thin leather, fleece lined, heated pairs, large garbage bag, rain poncho, extra toque or tube scarf (can double up or wrap around hands or camera, fleece blanket, compass, eyeglass cleaner, cloth, hand sanitizer, extra boots and socks if expecting to be near water. Additional winter gear: snowpants, parka, woolies, hand warmers for in gloves and boots, bear spray.
If you want to add fun by light painting bring a lantern with battery operated lighting (tea lights), string for glow sticks and a knife to cut string, large wand flashlight, selfie stick with stand for cell phone or 360 camera, battery operated tea lights and glow sticks, long white or cream flowing gown (used for Supernal Powers), mermaid costumes (just kidding, but I do have Mermaid costumes!).
Safety considerations: Fill the tank with gas. Bring food and hot beverage. Check road conditions before heading out and go with a friend if possible. No trespassing on properties! Listen for wildlife sounds, but don’t freak out! Move to the safety of your vehicle if necessary and trust your gut especially if alone. Carry bear spray and large heavy flashlight. Park so you can pull away quickly, not have to back out. Tell someone you trust where you are going and update them if you change your location. Carry winter emergency supplies in your car – first aid kit, blankets, candles, shovel, etc. On Facebook groups – do not give your location publicly (trust your friends and PM them).
Camera Settings
Shutter Speed and ISO Settings: You will usually need to change the shutter speed and ISO at the same time since they directly affect on one another. The key is allowing the most amount of light to hit your camera’s sensor in the least amount of time, in turn maintaining a lower ISO, inducing less image noise. After a few hours of photographing the Northern Lights, you will easily be able to adjust both settings simultaneously, obtaining great results. The lower the ISO the better but there are software programs (ex: Topaz DeNoise AI) to help remove noise in processing.
ISO settings of 400-2000 work well for aurora photography. Start with 10 seconds, Aperture: f/2.8 (or wider) ISO 800. Take a couple shots, check your screen and adjust accordingly. All the colour channels and luminance channels fall within the left-hand and right-hand sides of the histogram, meaning we’re not losing any detail in the dark areas or blowing out in highlights in the light areas. The goal is to keep your ISO as low as possible while still shooting at the correct f-stop and shutter speed to expose correctly for the scene. Since the Northern Lights changes colour, speed, and brightness all throughout the night, you’ll also need to constantly adjust your camera settings to match this dynamic situation.
Here are the steps to adjust ISO: Steps 1: Start out shooting with an ISO of 400-800 and take a practice shot. Step 2: If your practice shot wasn’t bright enough, increase your ISO to approximately 1200 and take a practice shot. Step 3: If the photo still isn’t bright enough, continue to increase your ISO until it is.
I usually shoot in the ISO range of 800-4000. Always keep in mind that your image should not be (in terms of the histogram) correctly exposed, you are shooting at night, so the image can also be dark. You can bring out nearly all of this dark detail in photo editing. Watch your histogram to make sure you’re not losing any dark detail off the left-hand side. You will also want to make sure that you’re not “blowing out” any highlights, meaning the histogram isn’t dropping off the right-hand side.
At night, the back of the camera appears brighter than it is when you upload your files and look at them on a monitor. That’s why it is so important to get it right in camera. Check your histogram often and know that it will always be more to the left, which is okay. A simple trick is to try to find what setting blows out the aurora light, then back off your settings until they don’t blow out the highlights in the histogram.
When editing, learn how to get the look you want by using your processing software and play around with the slider settings until you are seeing something you love. Avoid the use of presets.
Aperture Settings: f/2.8 is the best aperture setting for aurora photography. The wide lens opening allows your camera’s sensor to collect a lot of light from the scene while keeping your ISO and image noise low. You can keep the foreground acceptably sharp while shooting at f/2.8. With very wide apertures it becomes hard to focus at night, over the entire depth of field. If you light paint the foreground, you could focus on something in the foreground for better sharpness and combine the two images later in PS.
Shooting in Manual Mode allows you to manually adjust the ISO, Aperture, and shutter speed by hand. RAW Format will produce the best results for northern lights photography. The metering mode does not matter since at night your camera meter is not accurate. I use center-weighted average for landscape photography, so leaving it on that works well.
I find the best colour balance/white balance is Kelvin Values of 3200-4800. Use the Kelvin white balance setting on your camera to control this function. The goal is to “neutralize” the colour on the camera, so it matches exactly what you see with your eyes. The colours of a successful image should be very close to what you see in front of you in the sky. In light polluted skies there is ambient light reflecting off the atmosphere which creates a warm glow. If shooting in urban areas, lower the setting around 3400-3900 Kelvin. In darker, non-polluted skies, a setting of 4000 Kelvin or higher will give better results.
The recommended lens focal length for a full frame camera is between10-24mm range and for a crop sensor camera, use an 8mm-20mm range. For the F-Stop / Aperture setting I recommend f-stop settings of f/2.8 to f/4. Try a few different lenses if you have them to see what gets captured in each shoot to find a look you like.
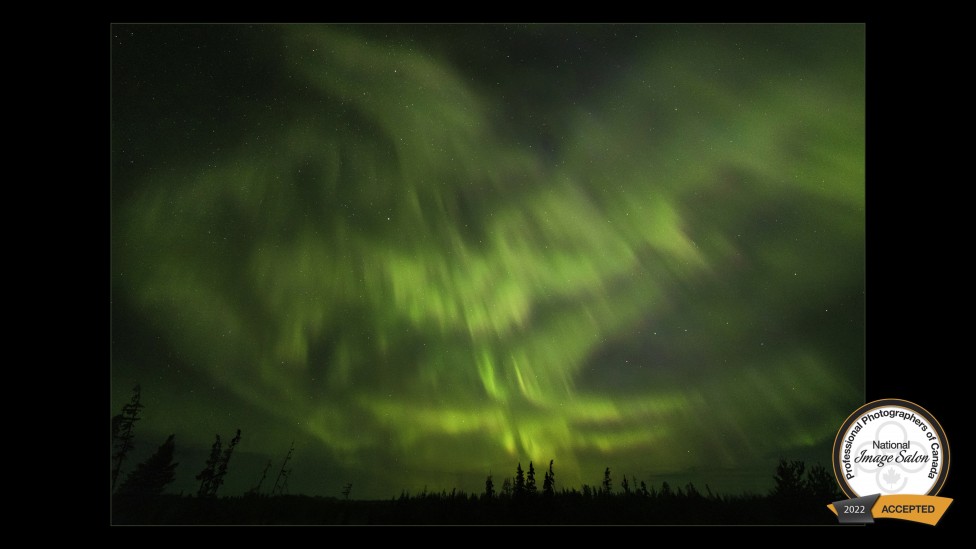
The goal for capturing the Northern Lights is to get vivid colour and nice detail. To avoid your image looking like a “blob of colour” we need to shoot at the shortest exposure time possible when there is quick movement. If the aurora was moving slowly through the sky the exposure time can be at the longer end. Think about it this way… Just like long exposures of water or clouds, all the colour and movement mixes together.
I recommend shutter speeds between 8 and 20 seconds, depending on f-stop. This will really depend on how bright and how quickly the aurora is moving through the sky. More than 20 seconds and you will see star movement.
If the aurora is moving very quickly throughout the sky, and you capture an image at a 30-second exposure, instead of seeing the instantaneous view that your eyes see, your camera will pick up the entire movement of the aurora over that 30-second time frame. The details and colours will become the average of the 30-second exposure for each pixel. When the aurora is moving quickly, try 3-7 second exposures. When it’s moving slower, or it’s not as bright, try 10-25 second exposures. Experimenting and taking as many shots as possible, at different shutters speeds will help you to learn what works best!
Some cameras have In-Camera Noise Reduction settings to apply noise reduction in the camera. If you have these settings, turn them OFF. They are only applied to JPEGS and while shooting in RAW they just waste battery power.
Since the sky and Northern Lights are very far away from us, focusing at or near infinity will work well for sharp images. An “∞” symbol is on most lenses which is used to mark the approximate infinity focus point. Focusing on this symbol doesn’t always produce the sharpest images. Confirm your manual settings are f/2.8, ISO 1000, 6 or 8 seconds, and widest focal length – 10mm - 25mm. If your lens has auto-focus switch it to manual focus. Verify you have sharp focus by taking a couple of practice shots and zooming in on the screen to make sure the focus point is sharp. Next, verify that the horizon in the image is also sharp, or whatever the furthest object in your composition happens to be. Use white or neon-coloured tape to mark you spot on the lens so the focal length does not move. (Or skip it but check images every so often.) I always shoot at the widest focal length (now my 14mm prime) and crop in processing.
Tips to Plan your shoot Step 1: Find Dark Skies. The easiest way to find an area with dark skies is to check the Blue Marble Light Pollution Map created by Google and NASA (https://blue-marble.de/nightlights/2019). The black areas are free of light pollution, while yellow areas have high light pollution. Shooting in dark areas will provide the best results.
Tips to Plan your shoot Step 2: Find Clear Skies. You don’t need perfectly clear skies to get some great shots. I usually aim for cloud cover percentages between 0%-30%. Use your local weather website and radar forecast. Astrospheric phone app is a great one for cloud cover, transparency, seeing, wind, temperature and dew point, as well as KP predictions for the net few days.
Tips to Plan your shoot: Most countries in the far north regions have their own Northern Lights activity service. The Aurora Pro phone app has live webcams as well as the KP index for your location. The Northern Lights activity index ( Kp-index ) ranges from 0-9 with 0 being the lowest amount of activity and 9 being the greatest. Here is an aurora and solar flare archive (https://www.spaceweatherlive.com/en/archive.html). KP-index ratings of 5 or greater are considered STORM LEVEL! I prefer to shoot on nights with a KP index of 4 or greater. I wait for Yellow Alerts and go on Red Alerts. Sign up for alerts through the www.SoftServeNews.com (no longer free) or purchase the app Aurora Alerts.
Here is a list of the forecasting websites I have used in the past:
Space Weather Live OVATION Auroral Forecast: A nice visual website that provides the current aurora forecast as well as other interesting facts which will help you to capture a photo of the Northern Lights https://www.spaceweatherlive.com/en/auroralactivity/auroral-oval.html, Space Weather Aurora Forecast: has a broad overview of the aurora forecast for a multi-day time frame. Scroll down and see the long term forecast with moon phases https://www.spaceweatherlive.com/en/auroralactivity/aurora-forecast.html,
Alberta Aurora Chasers on Facebook has 179K followers! https://www.facebook.com/groups/AlbertaAuroraChasers
Remember… The only guaranteed way to become good at anything is trying it for yourself and see what works. After a few nights practicing your skills under the night sky you will easily grasp all the concepts. Always remember you should never increase the ISO to obtain a brighter image prior to opening your aperture to the widest possible value ( f/2.8 works great) and dialing in the maximum exposure time while still maintaining nice detail in the Northern Lights.
What to do when Aurora doesn’t show up and it’s -20C
It’s a great time to be creative and practice using night photography settings. You can: Shoot the moon, Shoot the Stars and Milky Way, Light paint with flashlights, lanterns, tea lights, headlamp, headlights, light wands, capture Noctilucent Clouds with Aurora, capture meteor showers and passing comets. It’s a great time to be creative and practice using night photography settings, but you can also try Intentional Camera Movement, Double or Multiple Exposures, capture the glow from city or roads.
Truth lives in light, not in darkness. I am a seeker of light.
~Terril
Recently Terrill had her first solo exhibit! Her Aurora work was featured at Studio 2880 in Prince George, BC. You can see her work on her website at www.terrillbodner.com/auroras